


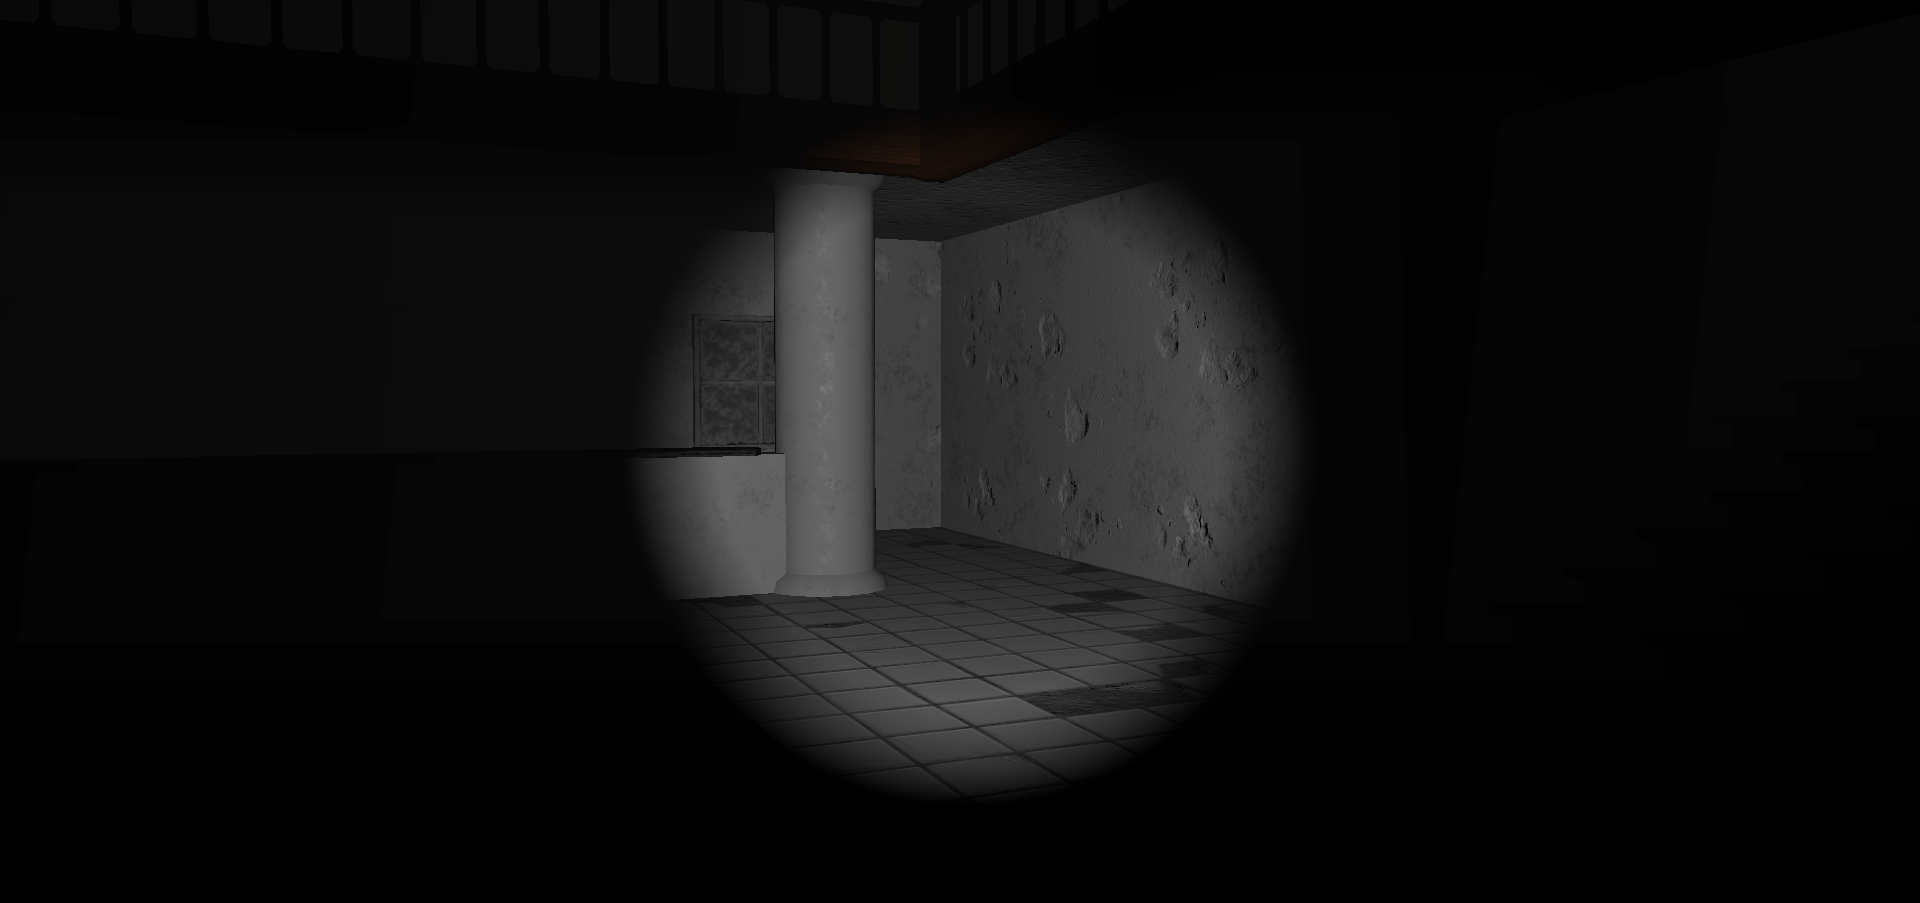
完成イメージ
今回は、意外と設定がややこしい、ゲームシーンを暗くする設定を紹介していきます!
使用アセット
Sceneのライティング設定
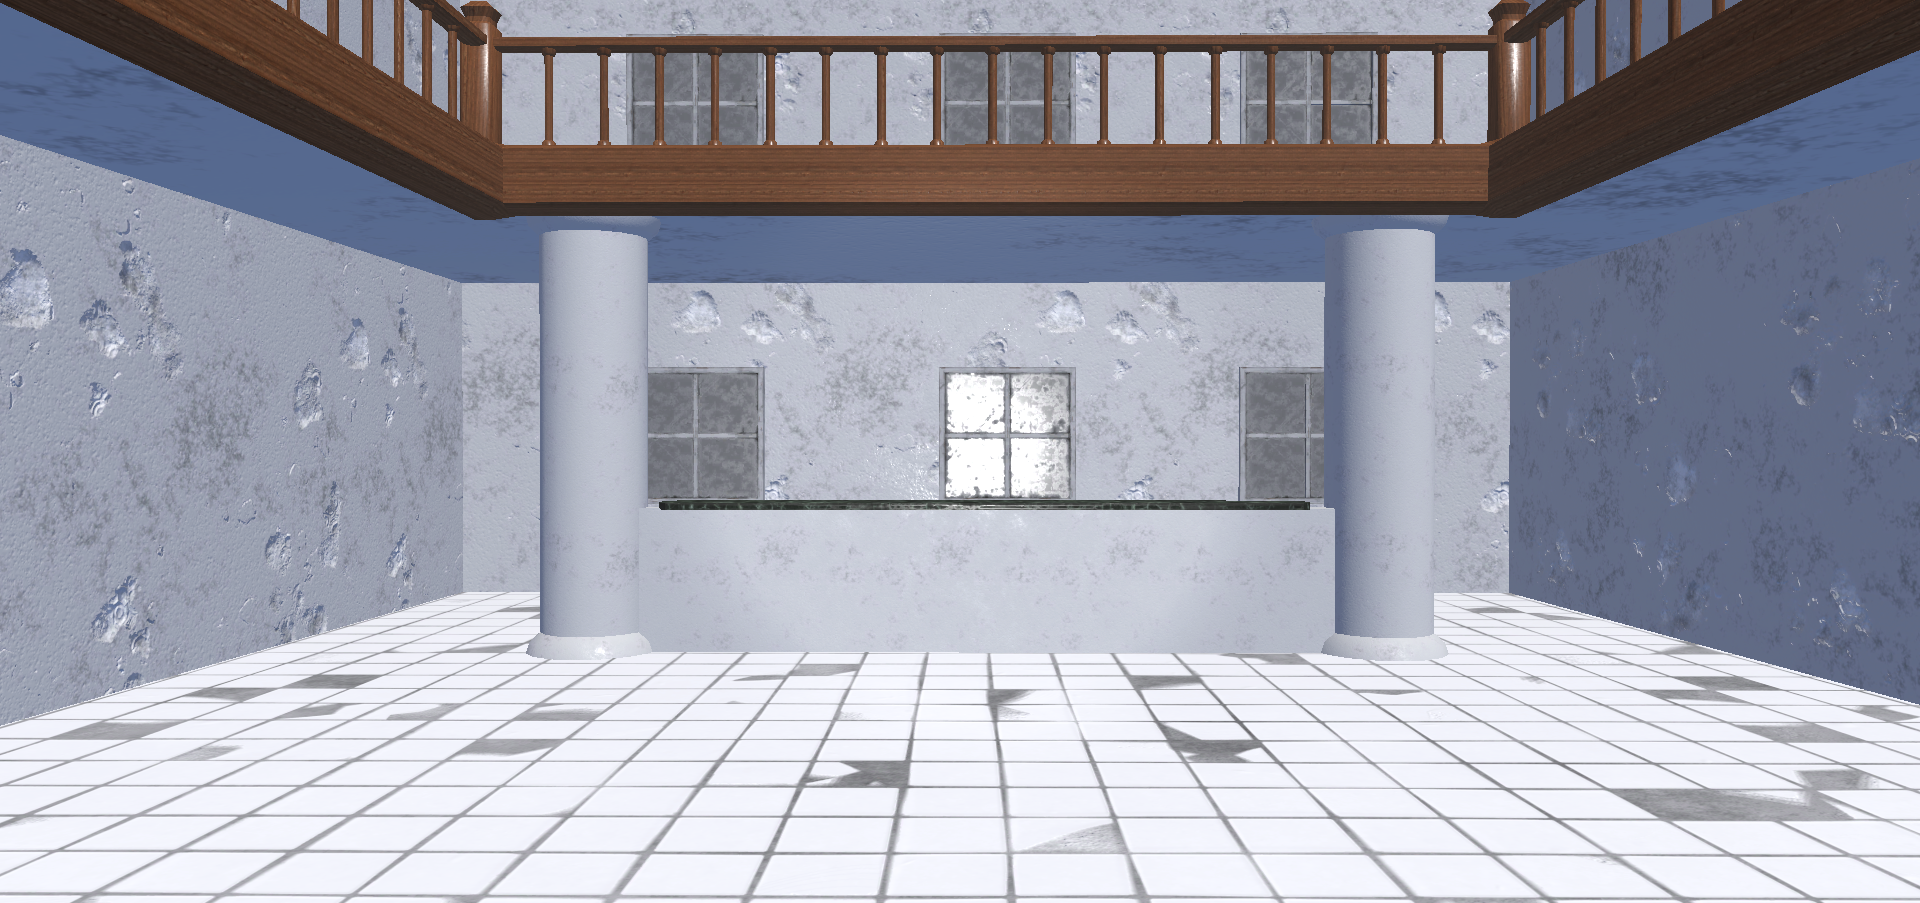
まずは、Unityデフォルトのシーンにアセットをそのまま配置してみました。
環境にもよりますが、だいたいこんな感じでホラーとは程遠い明るい見た目になっています...
シーンのDirectional Lightを消す
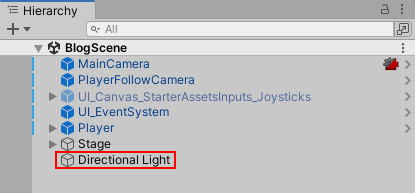
とりあえずシーンを暗くしたいので、シーンに配置されているDirectional Lightを削除します。

若干暗くなった感じもしますが、まだまだホラーゲームには程遠い明るさです。
シーンのLightingの設定を行う
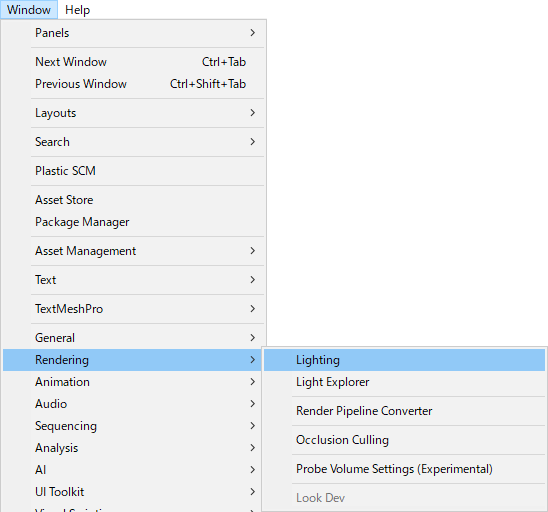
次は、さらにシーンを暗くするために、シーンのLightingの設定を行います。
画面上部の「Window → Rendering → Lighting」から設定画面を開きます。
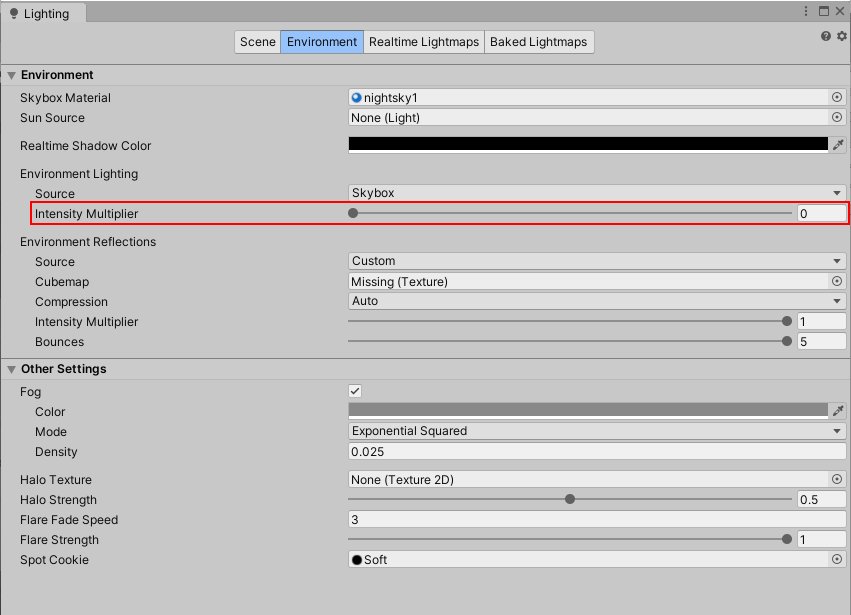
設定画面が開いたら、Environmentタブを開きます。
一覧の中にある、Intensity Multiiplierの値を0に設定します。
シーンが暗くなって、だいぶホラーゲームっぽくなりました!
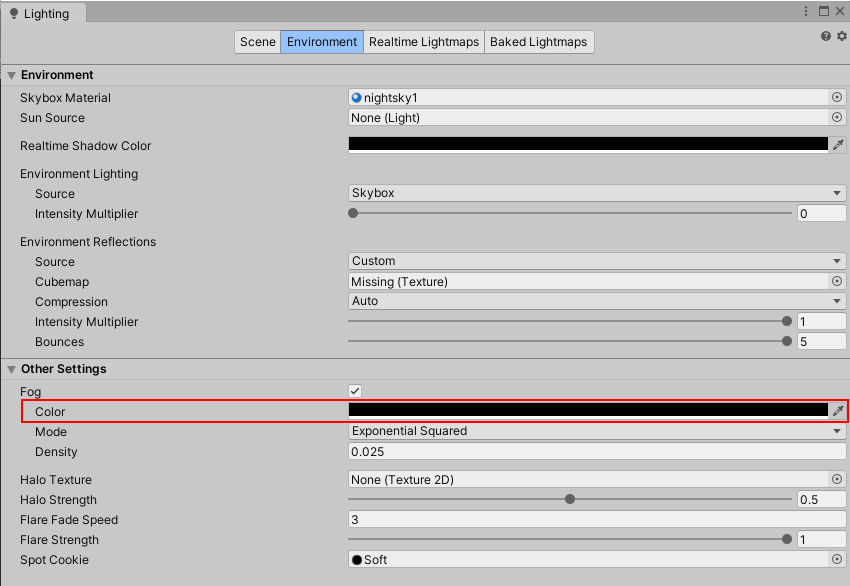
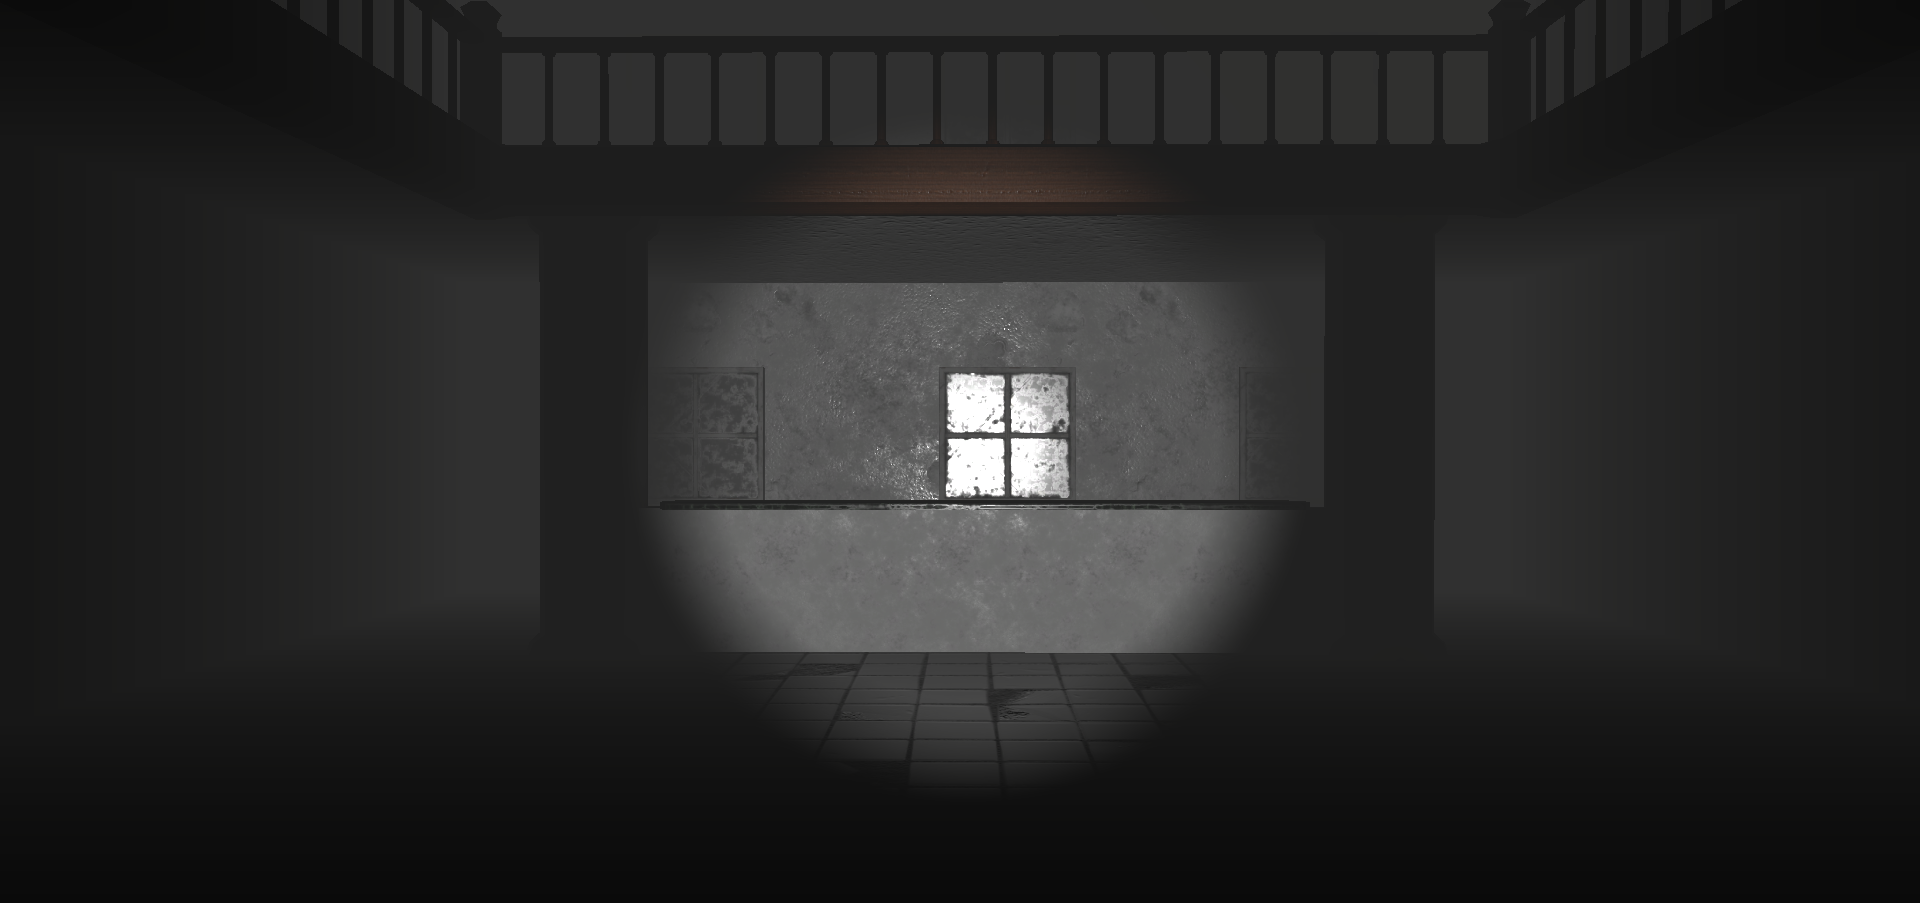
この後は好みになりますが、画面の曇り具合を設定していきます。
Other Settingsの中にある、FogのColorを黒っぽいカラーに設定します。
ライトの周りがうっすら映るいい感じの見た目になりました!
これで設定は以上です。
ちなみに、画面の懐中電灯っぽいライトは、Spot Lightをメインカメラの少し後ろに配置して角度を調整するだけで、それっぽくなります!
お疲れさまでした!